I recently made a wedding dress for a beach wedding. The bride fell in love with a dress out of a magazine, but it did not come in white. So, working together we came up with our own design. After I had it all just about completed, the bride decided that she wanted to have splashes of fuchsia on her dress. We decided to go with a corset back with fuchsia laces. I got to work creating the loops.
This is how I did it:
I pinned a piece of ribbon that matched the dress perfectly to a piece of scrap paper. I figured out how big I wanted the loops to be and measured the distance onto the paper. I then marked my paper every 1 inch so I could space the loops out evenly.
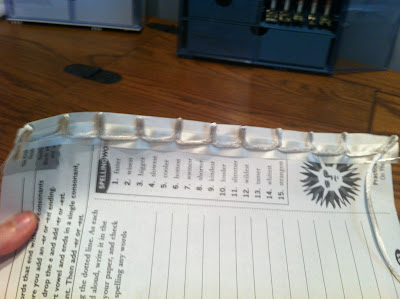
Next I sewed the loops and the ribbon directly onto the paper. The top of my loop lined up with the edge of the paper (as per my previous measurements). I back stitched over each loop to give it more strength.
I went down the entire length of the paper and this is what it looked like upon completion.
Next I peeled the now looped ribbon off the paper and discarded the paper.
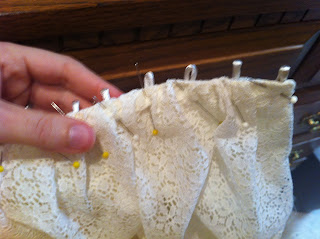
Then, I pinned the looped ribbon on the inside of the bodice back and sewed into place.
I repeated the same procedure on the other side...threaded the fuchsia ribbon through. I was very pleased with the results! I can't wait for the next fitting!!


Love using the paper to sew the loops. What a great idea! I'd love to see a photo of the bride in the dress when it is done! So pretty!
ReplyDeleteThis came out beautiful!! Love how you did the loops too. I agree with Wendy...would love to see the bride in her custom, one of a kind dress.
ReplyDeleteStopping by from Sumo's Sweet Stuff's linky party and a follower on FB and Pinterest.
Here is what I shared this week: http://craftybrooklynarmywife.blogspot.ca/2012/06/kids-roll-up-nap-blanket.html